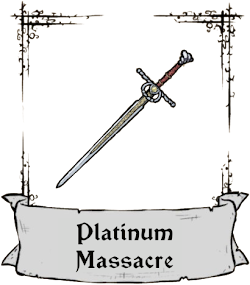
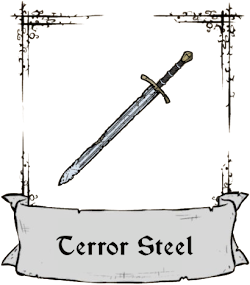
• Information
  • Home
  • Introduction
  • Game Mechanics
  • Controls

  • Attu's Equipment
  • Upgrades
  • Modules
  • Body Parts
  • Weapons
  • Items

  • The World
  • Bosses
  • Enemies
  • Vendors
  • Areas

  • Other Information
  • Story
  • Guides
  • Achievements
  • Art of Development
  • Contact

Weapons

Weapons
Index: Tier 1, Tier 2, Tier 3

In Feudal Alloy, your weapon of choice will be the two-handed sword, same as each body part focuses on the same primary effect, the sword will always focus on damage and then have another secondary effect. The primary and secondary effects bonuses are represented by the dot(s) next to the effect, one dot mean + 1 point boosting the effect.

There are five effects in total: armor, damage, oil capacity, cooling speed, and overheating temperature. The armor will decrease the amount of oil you lose when hit by the enemy, another one is damage, which increases attack effectiveness, so it takes fewer hits to destroy enemies and therefore heats up less. Furthermore, a part of the body can contain an oil tank, increasing the oil capacity, meaning Attu can withstand more attacks. The last two upgrades are cooling speed and overheating temperature. While cooling speed increases temperature loss and therefore speeds up cooling when Attu is not attacking, the overheating temperature bonus increases the amount of heat Attu's body can withstand before overheating, thus increasing the number of attacks Attu can make before overheating!

At the beginning of the game, you are looking to find and buy swords from the Tier 1 category by looting them from the chests on maps 1–3 or buying them from a vendor in its first location on map 1. The primary effect for tier 1 swords is always Damage ●, and it's recommended to focus on damage bonus for the secondary effect as well, since it will have the most impact at the start.


Tier 1 Swords


Name Primary Effect Secondary Effect Availability
Iron Grasscutter Damage ● None starting weapon
Bronze Silence Damage ● Damage ● sold by vendor (1) for 1950 coins
Iron Peacemaker Damage ● Damage ● found in the chest on map 3
Bronze Storm Damage ● Armor ● found in the chest on map 1
Iron Slicer Damage ● Armor ● sold by vendor (1) for 2130 coins
Iron Peacekeeper Damage ● Cooling speed ● sold by vendor (1) for 2020 coins
Steel Defender Damage ● Cooling speed ● sold by vendor (1) for 2050 coins
Bronze Justice Damage ● Oil capacity ● found in the chest on map 2
Terror Steel Damage ● Oil capacity ● found in the chest on map 2
Steel Protector Damage ● Overheat temperature ● found in the chest on map 1


  • Effects
    Damage ●

    Availability
    Weapon you have equipped from the start of the game.

  • Effects
    Damage ●
    Damage ●

    Availability
    Sold by a vendor in its first location on map 1 for 1950 coins.

  • Effects
    Damage ●
    Damage ●

    Availability
    Found in the chest on map 3; if more assistance is needed, follow the full map guide.

  • Effects
    Damage ●
    Armor ●

    Availability
    Found in the chest on map 1; if more assistance is needed, follow the full map guide.

  • Effects
    Damage ●
    Armor ●

    Availability
    Sold by a vendor in its first location on map 1 for 2130 coins.

  • Effects
    Damage ●
    Cooling speed ●

    Availability
    Sold by a vendor in its first location on map 1 for 2020 coins.

  • Effects
    Damage ●
    Cooling speed ●

    Availability
    Sold by a vendor in its first location on map 1 for 2050 coins.

  • Effects
    Damage ●
    Oil capacity ●

    Availability
    Found in the chest on map 2; if more assistance is needed, follow the full map guide.

  • Effects
    Damage ●
    Oil capacity ●

    Availability
    Found in the chest on map 2; if more assistance is needed, follow the full map guide.

  • Effects
    Damage ●
    Overheat temperature ●

    Availability
    Found in the chest on map 1; if more assistance is needed, follow the full map guide.


Index: Tier 1, Tier 2, Tier 3

As you progress past the initial three maps, you will start looting swords from the Tier 2 category; this will be the case throughout maps from 4 to 6, with one exception where you can return to map 1 and finally pick up the Silver Amnesia. Furthermore, at the beginning of the map 4, you will meet a vendor in its second location, and in its supply, there are Tier 2 swords as well. The primary effect for Tier 2 swords is always Damage ● ●, so don't forget to replace your sword from the previous tier.


Tier 2 Swords


Name Primary Effect Secondary Effect Availability
Hope of Silver Damage ● ● Damage ● found in the chest on map 4
Silver Amnesia Damage ● ● Damage ● found in the chest on map 1
Copper Anarchy Damage ● ● Armor ● sold by vendor (2) for 2250 coins
Titanium Destiny Damage ● ● Armor ● sold by vendor (2) for 2320 coins
Bellator Damage ● ● Cooling speed ● sold by vendor (2) for 2260 coins
Copper Guardian Damage ● ● Cooling speed ● found in the chest on map 5
Tobator Damage ● ● Oil capacity ● sold by vendor (2) for 2340 coins
Silver Hysteria Damage ● ● Oil capacity ● found in the chest on map 4
Titanium Blade Damage ● ● Overheat temperature ● found in the chest on map 6
Palladium Catastrophe Damage ● ● Overheat temperature ● found in the chest on map 6


  • Effects
    Damage ● ●
    Damage ●

    Availability
    Found in the chest on map 4; if more assistance is needed, follow the full map guide.

  • Effects
    Damage ● ●
    Armor ●

    Availability
    Found in the chest on map 1; if more assistance is needed, follow the full map guide.

  • Effects
    Damage ● ●
    Damage ●

    Availability
    Sold by a vendor in its second location on map 4 for 2250 coins.

  • Effects
    Damage ● ●
    Armor ●

    Availability
    Sold by a vendor in its second location on map 4 for 2320 coins.

  • Effects
    Damage ● ●
    Cooling speed ●

    Availability
    Sold by a vendor in its second location on map 4 for 2260 coins.

  • Effects
    Damage ● ●
    Cooling speed ●

    Availability
    Found in the chest on map 5; if more assistance is needed, follow the full map guide.

  • Effects
    Damage ● ●
    Oil capacity ●

    Availability
    Sold by a vendor in its second location on map 4 for 2340 coins.

  • Effects
    Damage ● ●
    Oil capacity ●

    Availability
    Found in the chest on map 24; if more assistance is needed, follow the full map guide.

  • Effects
    Damage ● ●
    Overheat temperature ●

    Availability
    Found in the chest on map 6; if more assistance is needed, follow the full map guide.

  • Effects
    Damage ● ●
    Overheat temperature ●

    Availability
    Found in the chest on map 6; if more assistance is needed, follow the full map guide.


Index: Tier 1, Tier 2, Tier 3

You fought through more than half of the game, and battles became more fierce. From map 7 to the end game on map 10, you will loot swords from the Tier 3 category, with the exception of Leator, which you can return to on map 5 and finally pick it up. Furthermore, you will meet a vendor in its third and final location on map 7, where you can buy Tier 3 swords as well. The primary effect for Tier 3 swords is always Damage ● ● ●, so maximum damage bonus, and you will be deciding on the secondary effect based on your gameplay strategy for the end game.


Tier 3 Swords


Name Primary Effect Secondary Effect Availability
Platinum Glory Damage ● ● ● Damage ● sold by vendor (3) for 3220 coins
Platinum Crusher Damage ● ● ● Damage ● found in the chest on map 7
Gold Chaos Damage ● ● ● Armor ● found in the chest on map 9
Leator Damage ● ● ● Armor ● found in the chest on map 5
Gold Champion Damage ● ● ● Cooling speed ● sold by vendor (3) 3180 coins
Platinum Blinder Damage ● ● ● Cooling speed ● found in the chest on map 9
Platinum Massacre Damage ● ● ● Oil capacity ● sold by vendor (3) 3190 coins
Platinum Fighter Damage ● ● ● Oil capacity ● sold by vendor (3) 3250 coins
Rhodium Destroyer Damage ● ● ● Overheat temperature ● found in the chest on map 10
Rhodium Breaker Damage ● ● ● Overheat temperature ● found in the chest on map 8


  • Effects
    Damage ● ● ●
    Damage ●

    Availability
    Sold by a vendor in its third location on map 7 for 3220 coins.

  • Effects
    Damage ● ● ●
    Damage ●

    Availability
    Found in the chest on map 7; if more assistance is needed, follow the full map guide.

  • Effects
    Damage ● ● ●
    Armor ●

    Availability
    Found in the chest on map 9; if more assistance is needed, follow the full map guide.

  • Effects
    Damage ● ● ●
    Armor ●

    Availability
    Found in the chest on map 5; if more assistance is needed, follow the full map guide.

  • Effects
    Damage ● ● ●
    Cooling speed ●

    Availability
    Sold by a vendor in its third location on map 7 for 3180 coins.

  • Effects
    Damage ● ● ●
    Cooling speed ●

    Availability
    Found in the chest on map 9; if more assistance is needed, follow the full map guide.

  • Effects
    Damage ● ● ●
    Oil capacity ●

    Availability
    Sold by a vendor in its third location on map 7 for 3190 coins.

  • Effects
    Damage ● ● ●
    Oil capacity ●

    Availability
    Sold by a vendor in its third location on map 7 for 3250 coins.

  • Effects
    Damage ● ● ●
    Overheat temperature ●

    Availability
    Found in the chest on map 10; if more assistance is needed, follow the full map guide.

  • Effects
    Damage ● ● ●
    Overheat temperature ●

    Availability
    Found in the chest on map 8; if more assistance is needed, follow the full map guide.


Home
Subscribe to: Posts (Atom)